Lab 0 - Getting Started
This first lab or tutorial, will walk you through the tools and the proejct structure that will be used for this course.
Ponderation: 0%
Objectives:
- Creating your first MAUI App
- Creating an Android Emulator
- Getting familiar with the .NET MAUI project structure
- Modifying existent buttons and labels
- Adding pages
- Creating basic navigation
Creating your first .NET MAUI App
It’s recommended that you use the school PCs to complete the labs because they have already been correctly configured and have the recommended specs.
Steps:
-
Open Visual Studio 2022
-
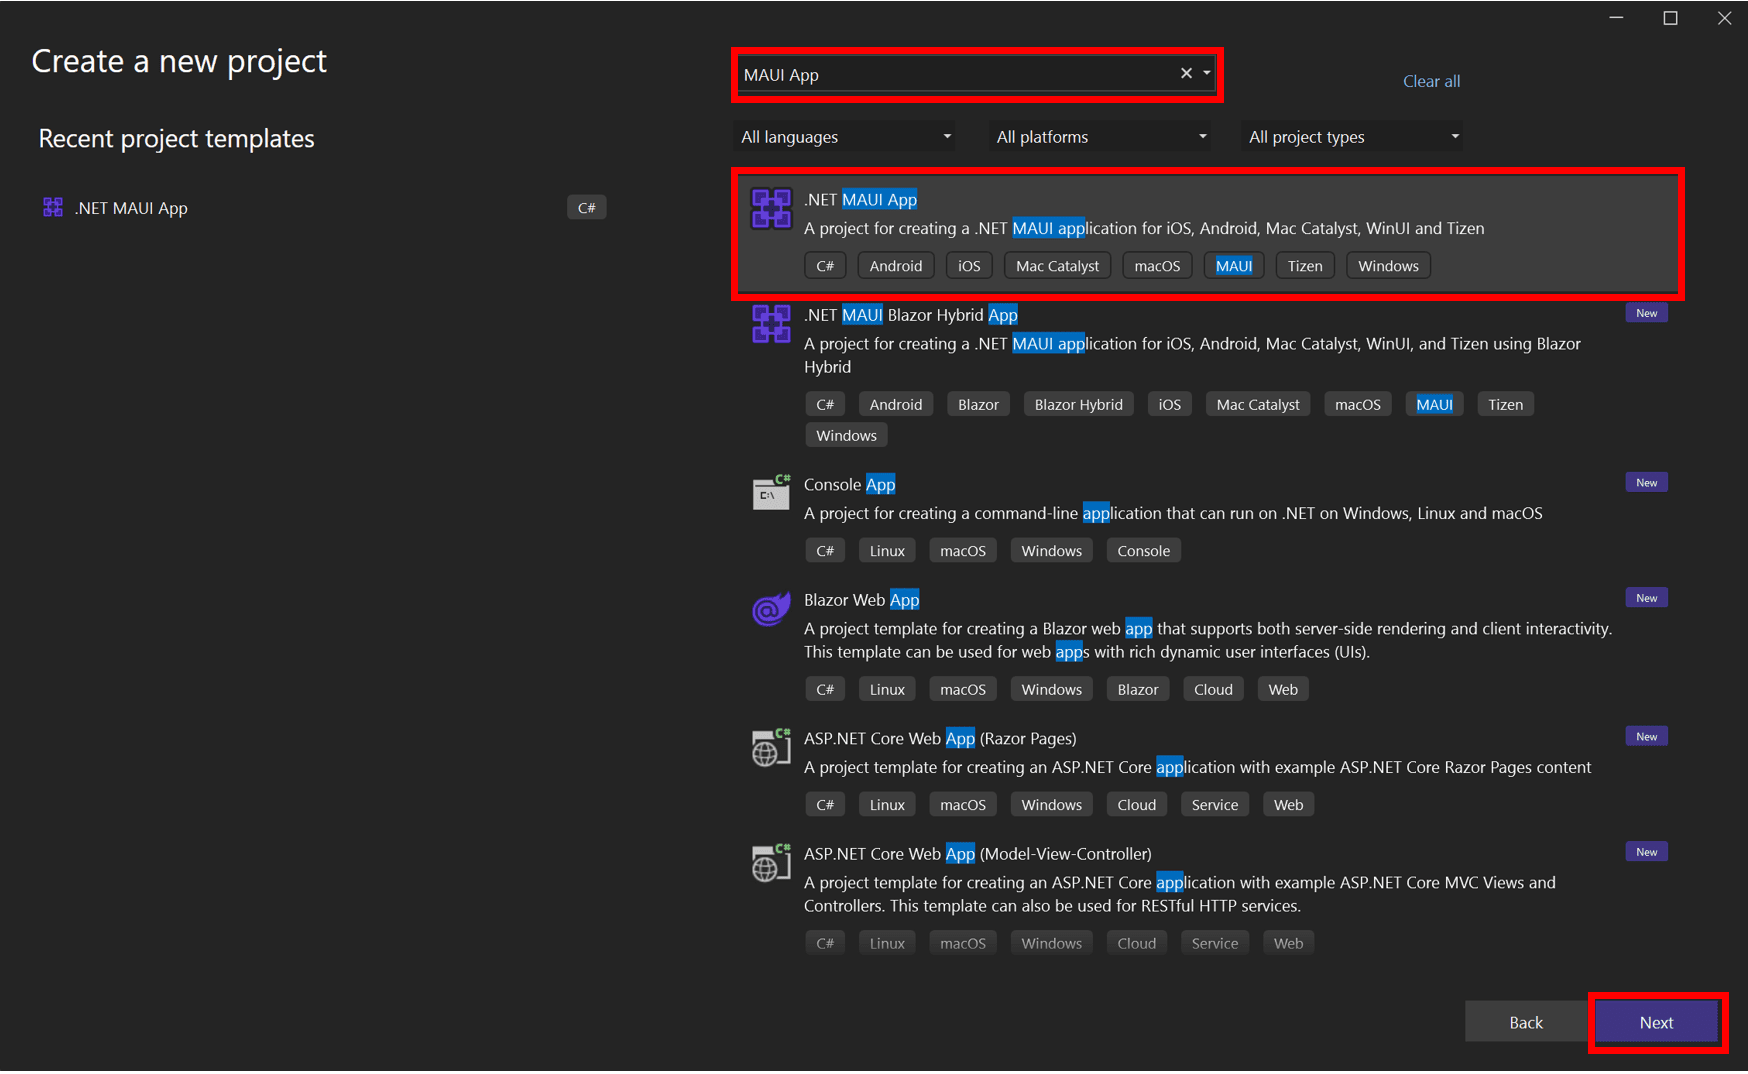
Create a MAUI App from the project templates
-
Choose a name and location for your new MAUI app.
-
Select the latest .NET framework available. It should be .NET 6.0 or 8.0 (Long term Support)
-
Press the Play button to build the project on your Windows computer:

-
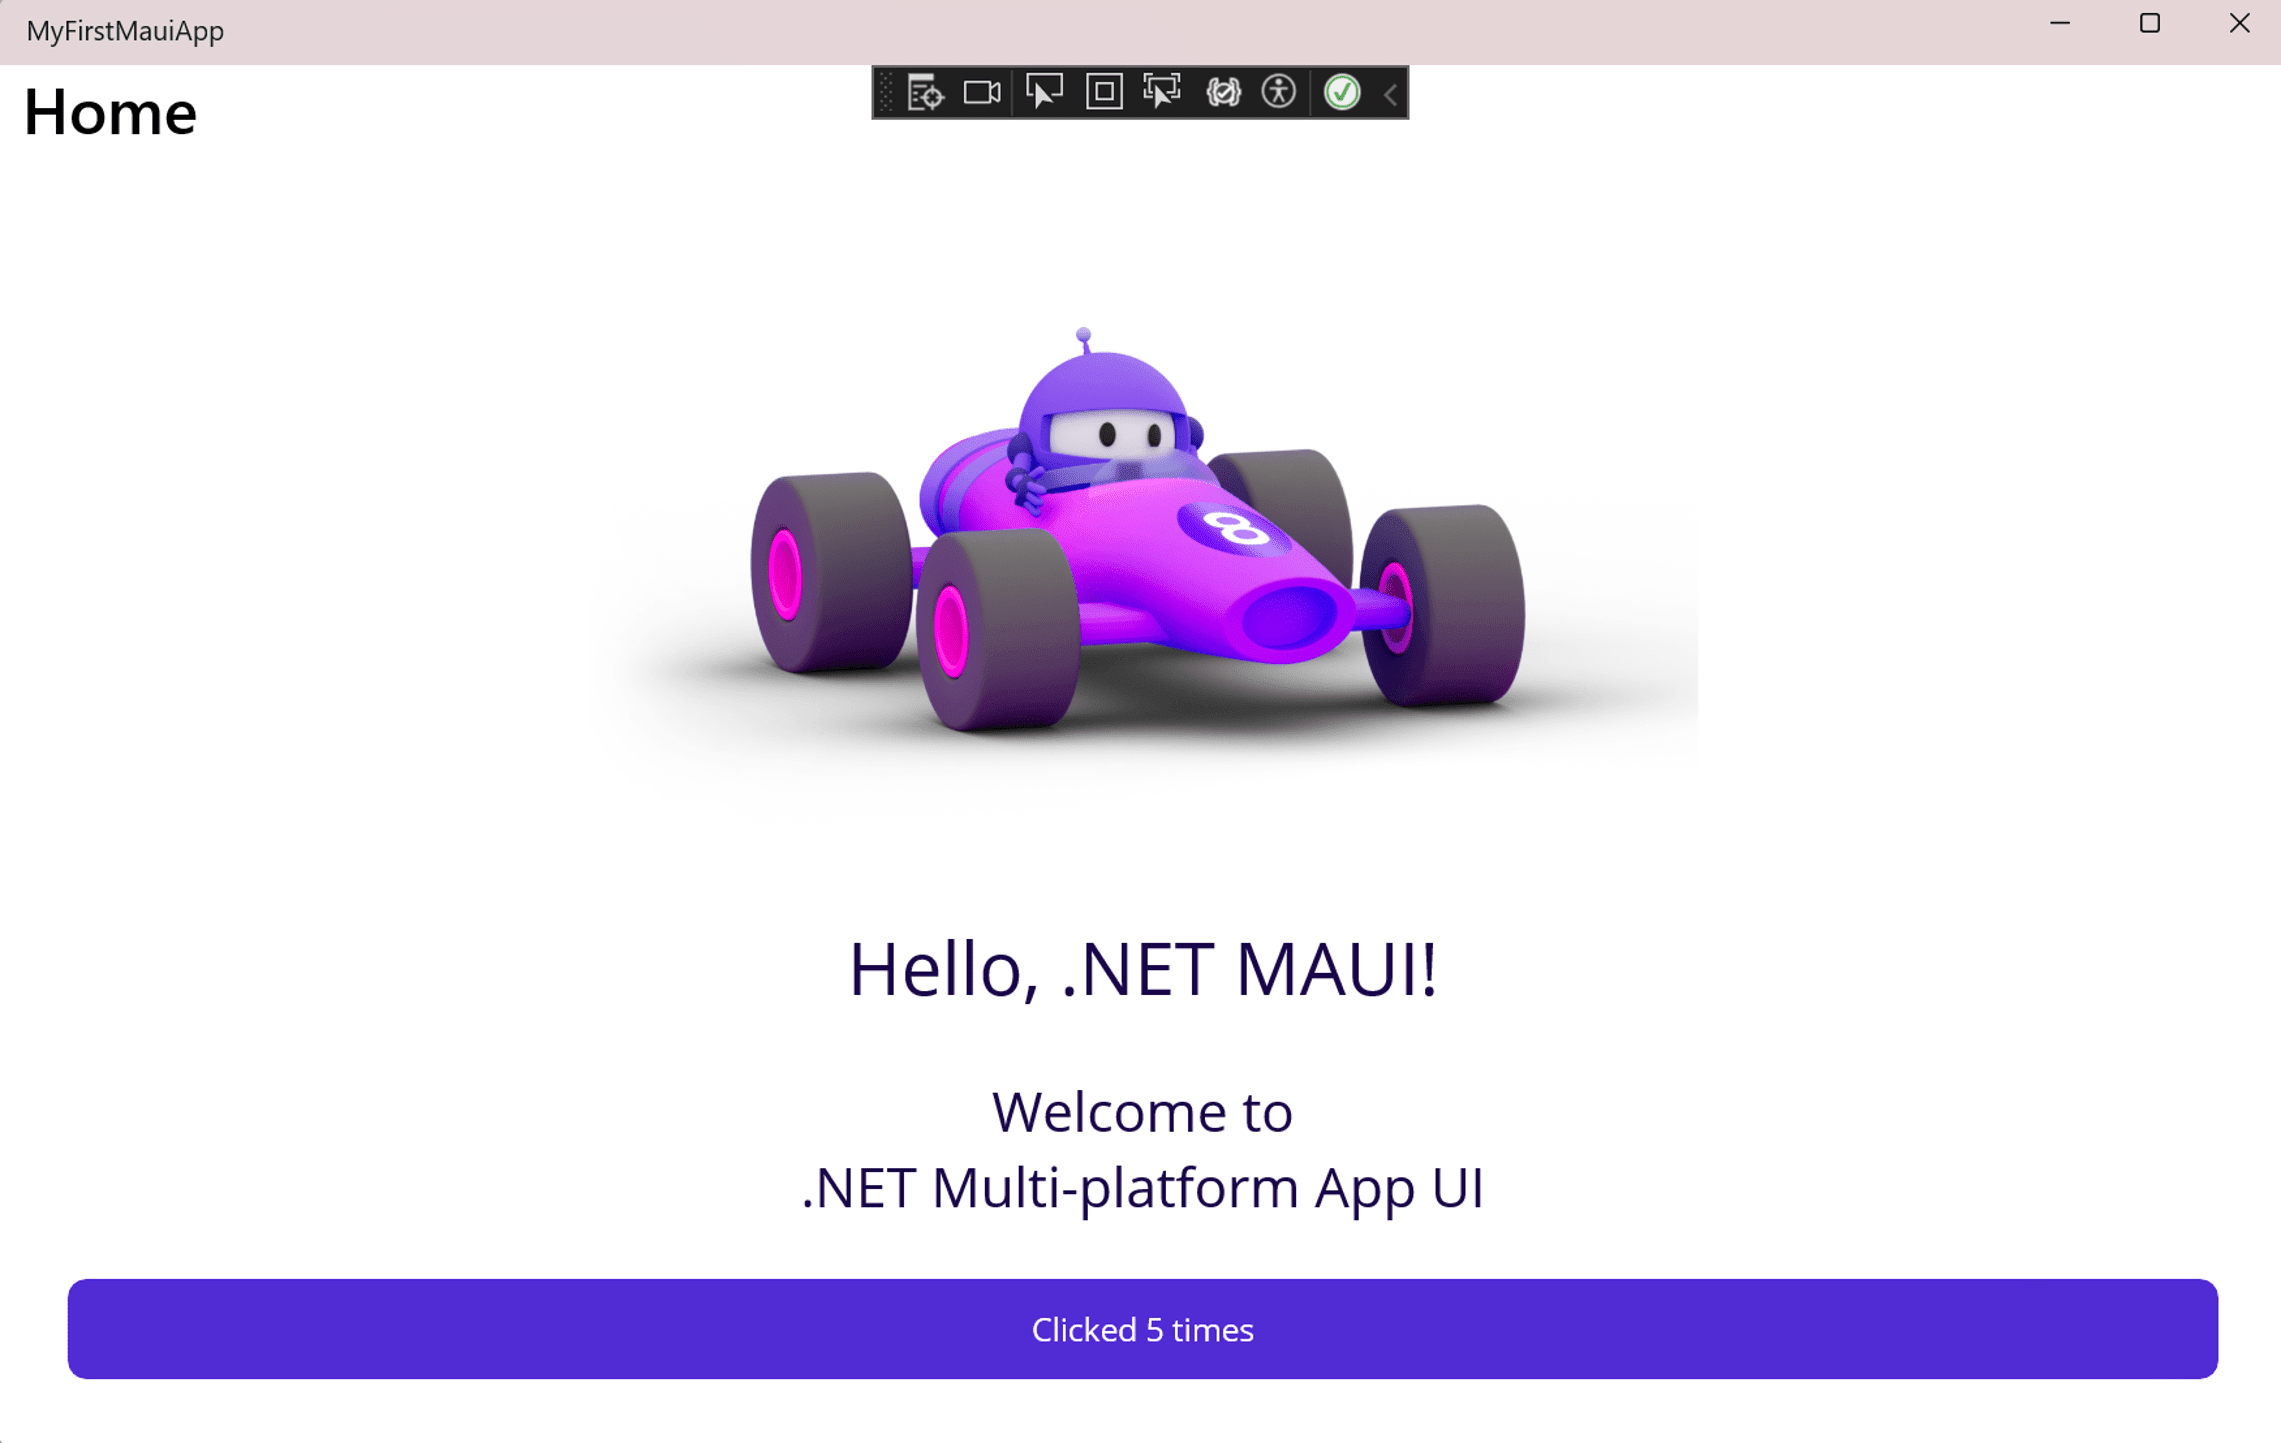
You should now see the MAUI template project app:
-
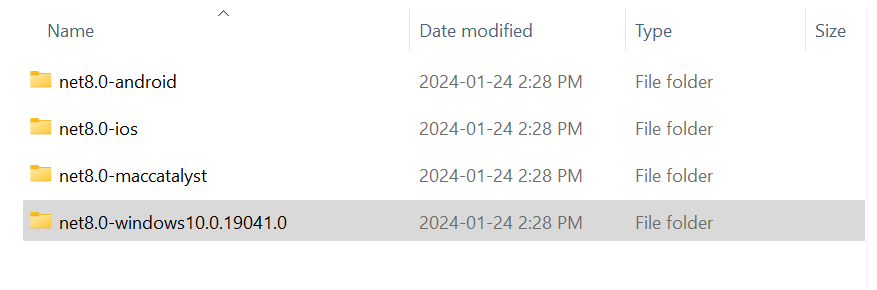
On File Explorer, navigate to your
<project folder>/bin/Debug/, you should see multiple folders on which your app can be deployed. For now, the only folder that contains a deployed solution is the Windows folder:
- For each platform used when debugging, an executable is created for the associated platform.
Debugging on the Android Emulator
The android emulator created by Google will allow us to simlulate the hardware of an Android device on your Windows machine. It’s integrated into Visual studio 2022.
-
Pre-requisite: Enabling hardware acceleration with Android emulator and install the Android SDK API. Make sure that your PC has the minimum requirements before proceeding.
-
The installation and configuration of the Android Emulator should already be done on the lab PCs.
Steps:
- From Visual Studio 2022, open the
Tools > Android > Android Device Manager - Create a new device, this should open the New Device pop-up.
- For this course, most of the labs will be tested on the:
Pixel 5 - API 33 emulatorwith the default configuration. - Create an emulator of your choice and try debugging the app.
Modifying the MainPage
Steps:
-
Run your project on the newly created emulator
-
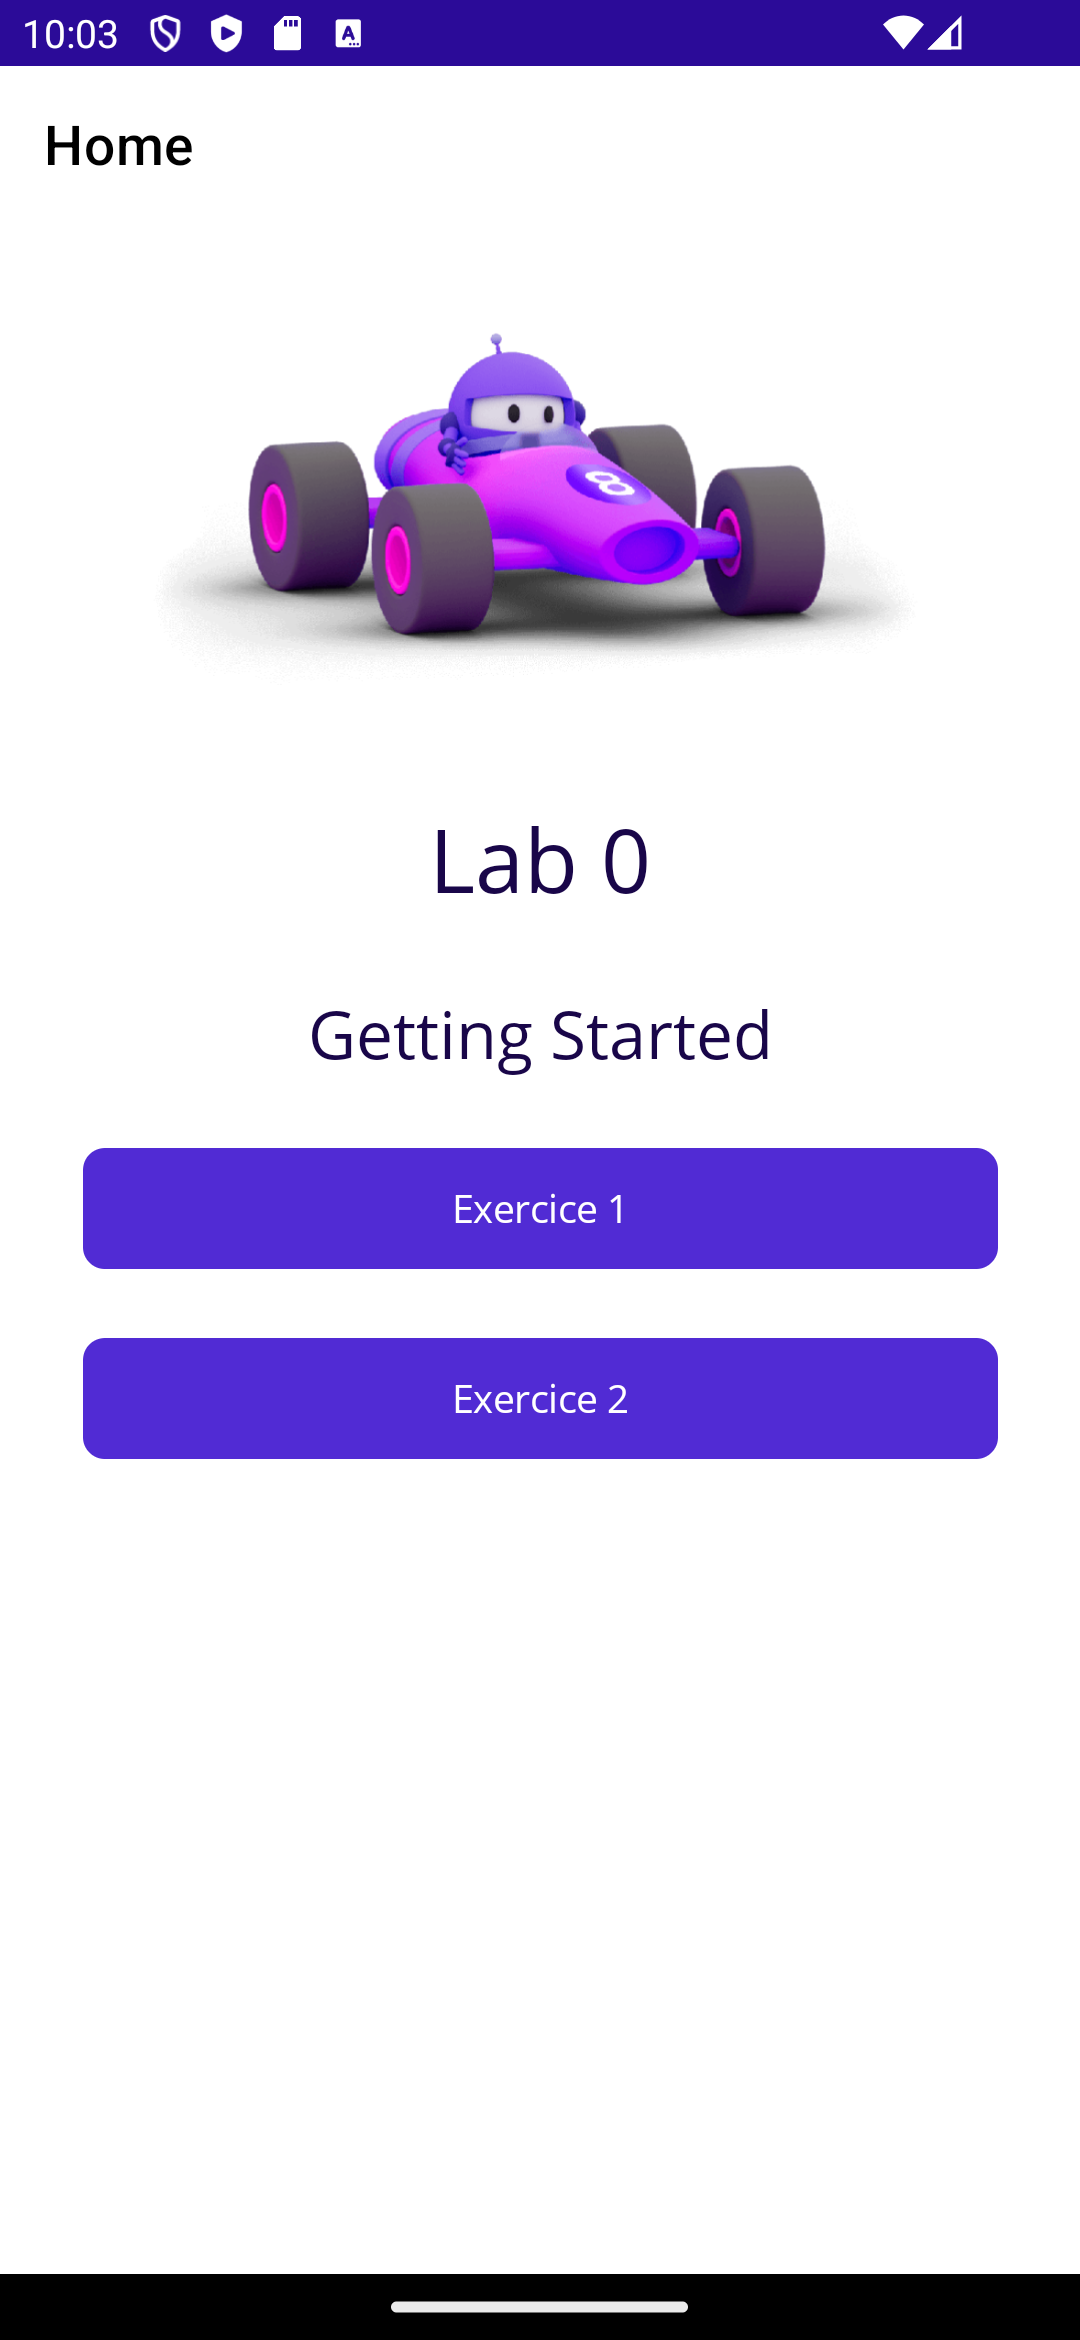
Open the
MainPage.xamlfile and modify the following:Label1 text: “Lab0”Label2 text: “Getting Started”- Remove the
CounterBtn - Add a
Button:Text:"Exercice 1"Clicked:"Btn_Exercice1_Clicked"(Create a new event handler)
- Add a
ButtonText: “Exercice 2”:Text:"Exercice 1"Clicked:"Btn_Exercice2_Clicked"
Adding other pages
Steps:
- Add a new file to your project
- Select the template
.NET MAUI ContentPage - Name it
Exercice1.xaml - Modify the default
Label:Text= “Exercice 1” - Add a another file to your project
- Select the template
.NET MAUI ContentPage - Name it
Exercice2.xaml - Modify the default
Label:Text= “Exercice 2”
Basic Navigation
PushAsync
To Navigate to the newly created pages, we will be pushing the pages on the stack using PushAsync method as such:
Navigation.PushAsync(new Exercice1());
Let’s observe the signature of this method signature for a minute:
public System.Threading.Tasks.Task PushAsync (Microsoft.Maui.Controls.Page page);
-
This method returns a
Taskasynchronously. This means that the newly pushed page will be pushed in the background without freezing the current application thread. -
What do you think would happen if this method was not async?
-
What do you think would happen if the page takes time to load?
Steps:
- Modify the signature of your event handler to add the keyword
async:
private async void Btn_Exercice1_Clicked(object sender, EventArgs e)
- You must now await the
Navigation.PushAsyncmethod and provide an instance of theExercice1Page. To do that, you must add the keywordawaitbefore the call of the method.
private async void Btn_Exercice1_Clicked(object sender, EventArgs e)
{
    await Navigation.PushAsync(new Exercice1());
}
-
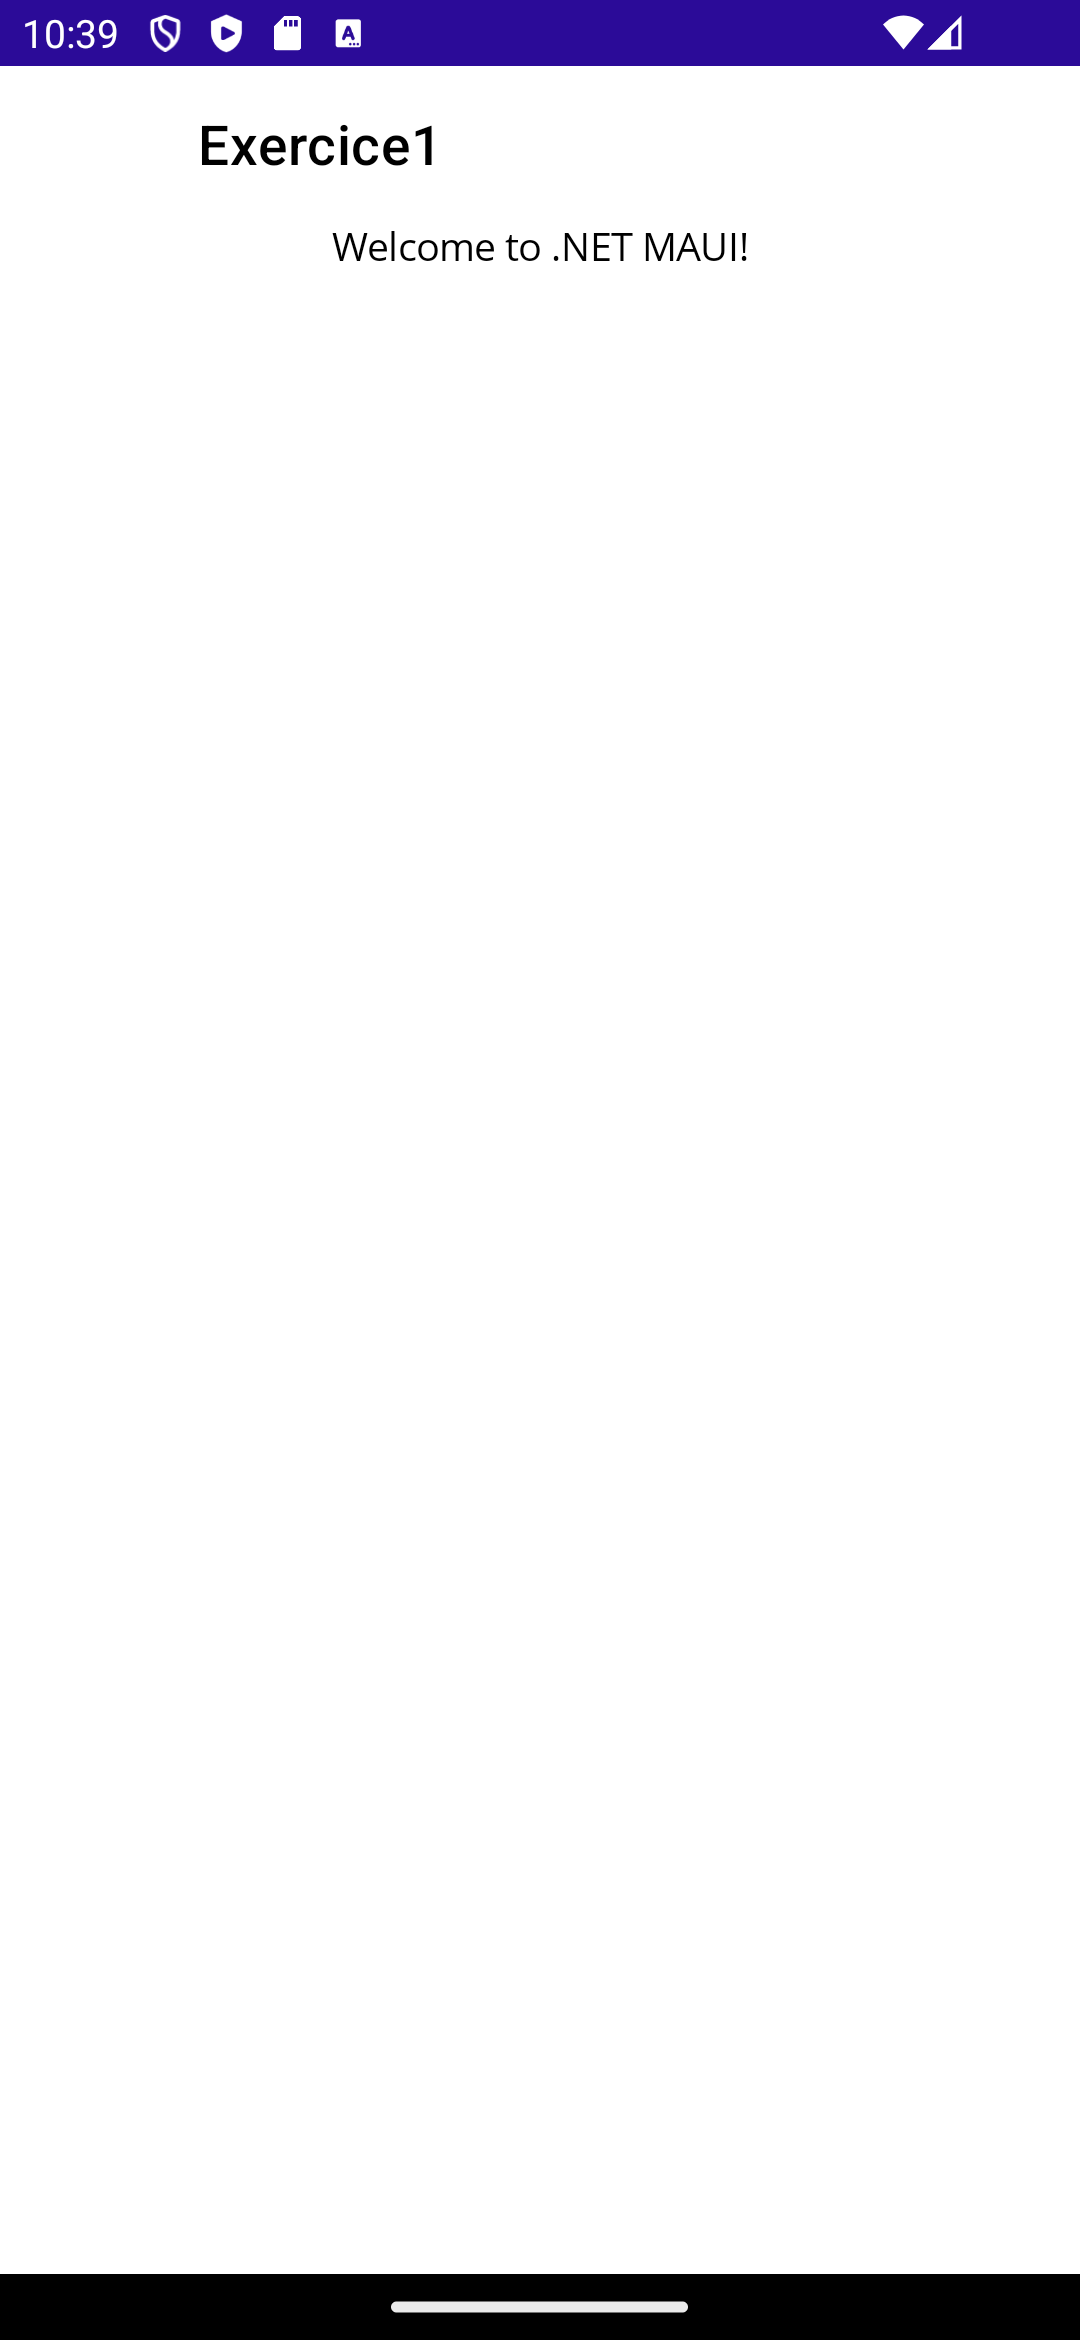
Re-run the app. You should be able to see the
Exercice1page once you click on the Button: -
Repeat the same steps to navigate to the
Exercice 2Page.
NavigationPage
- This way of pushing pages on top the of navigation stack is part of a style of navigation called:
NavigationPage - In the
NavigationPage, pages has three events: pushed, popped or popped to root for any pages it contains. - Other navigation modes:
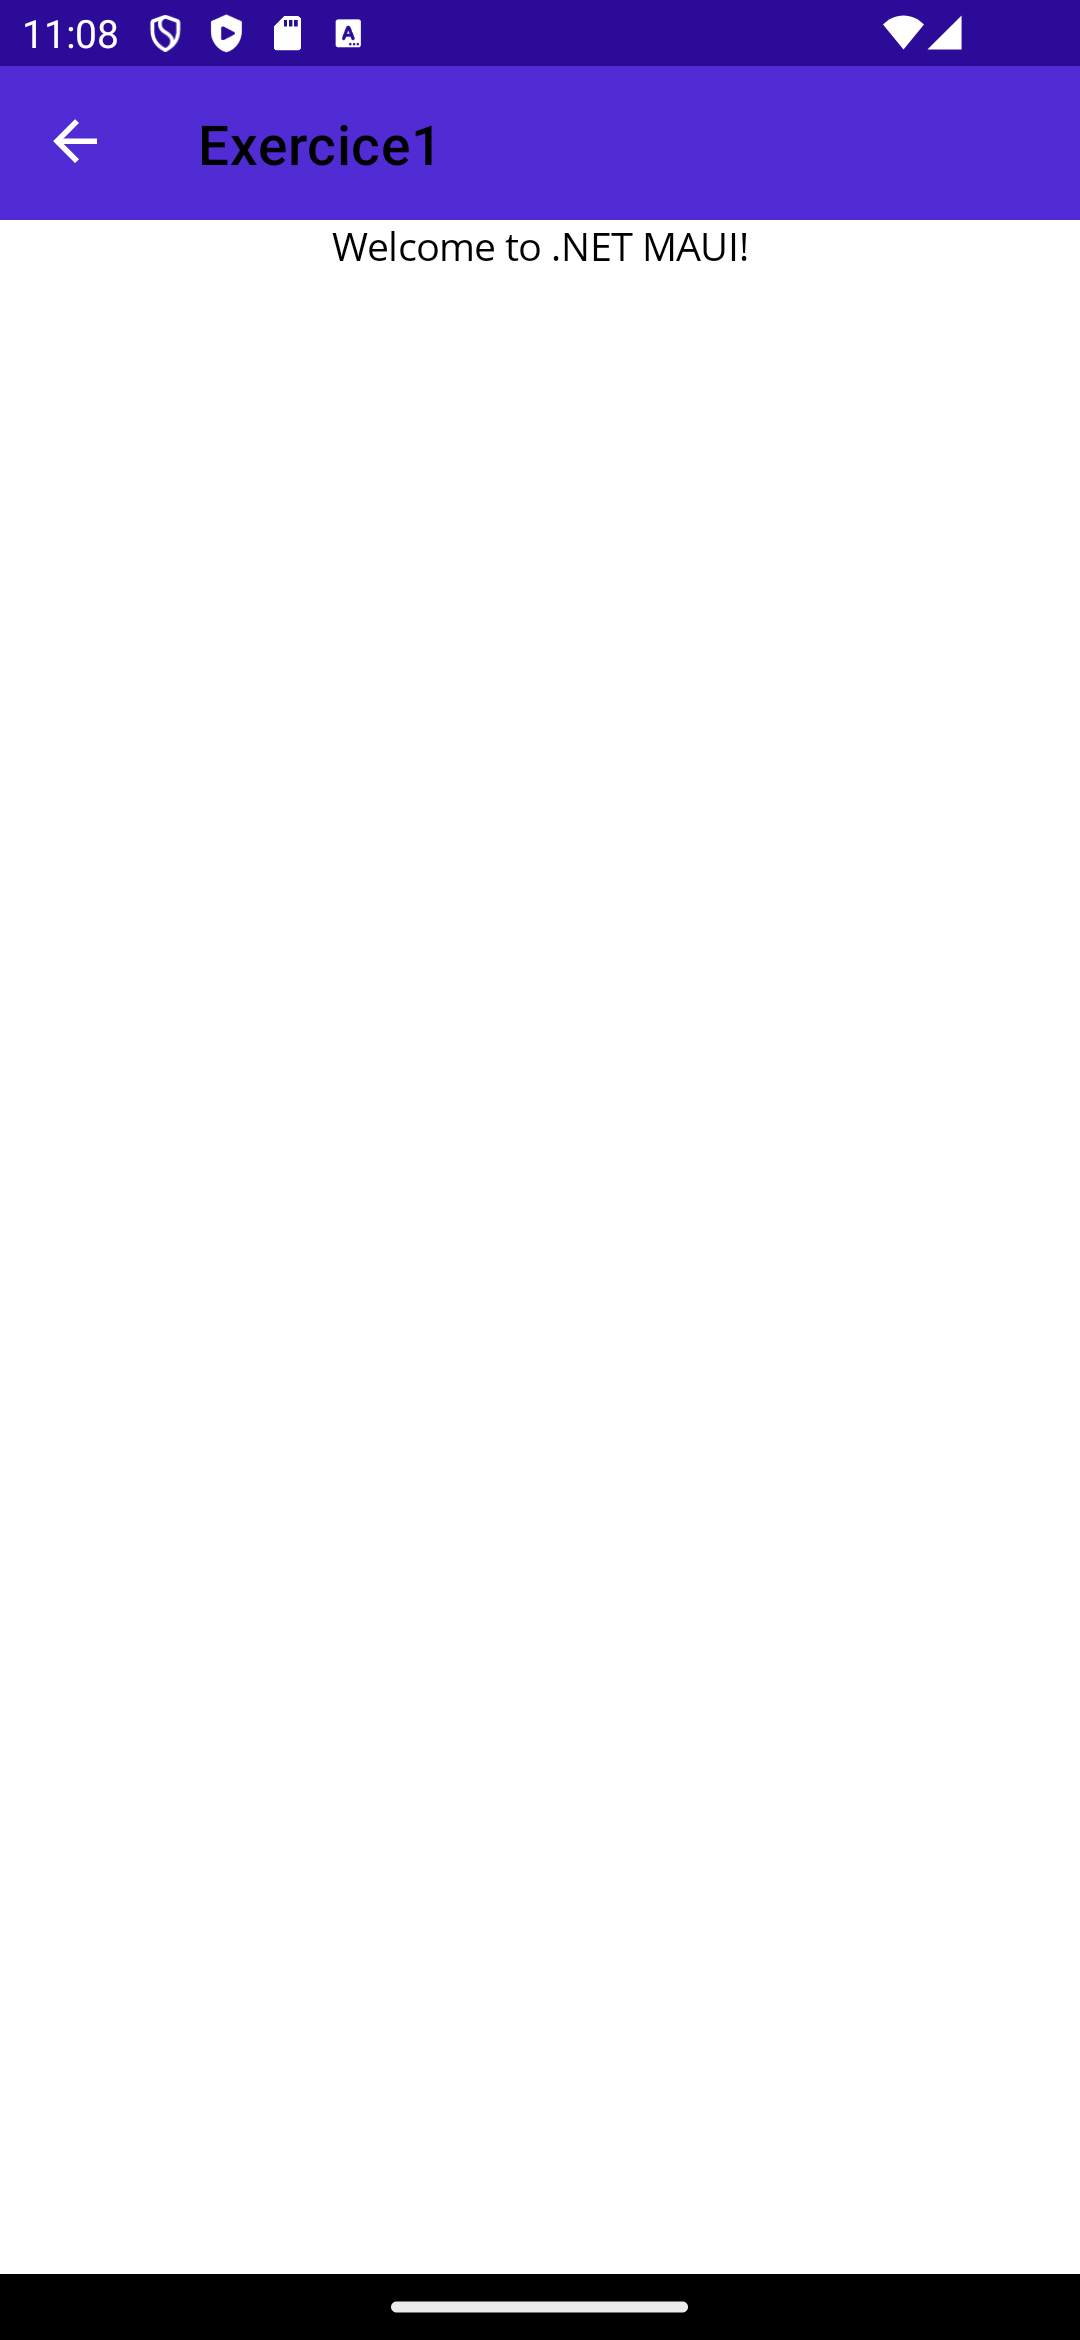
FlyoutPage,TabbedPage - Many properties of the
NavigationPagecan be useful to customize the app. - You’ll notice that once you clicked on a page, you can click at the top left corner (back button) to popped the current page and return to the
MainPage
Steps:
Let’s modify the Navigation bar back ground color (by default white):
-
Open the
AppShell.xamlfile -
In the
Shelltag add the following property (you may choose another color):Shell.BackgroundColor="{StaticResource Primary}"
-
Now as you click on the page, the back button should be clearly visible: